Create volumes (virtual external hard drive)
This feature is available only on desktops created after major update in autumn 2025.
After creating a desktop you need to create a volume to save your data on it. Volume can act as a backup if the virtual desktop becomes unresponsive.
Please note that after the virtual desktop is set up, the volume can only be extended with additional storage if no data or files have been saved on it. To request an extension, contact CSC Service Desk, (subject: SD Desktop).
A volume is like a virtual USB stick for storing your data. You can attach it to one virtual desktop at a time or move it between desktops in the same CSC project — just like plugging and unplugging a USB stick from your laptop. You can create multiple volumes for one CSC project and it doesn't require technical expertise.
Step by step
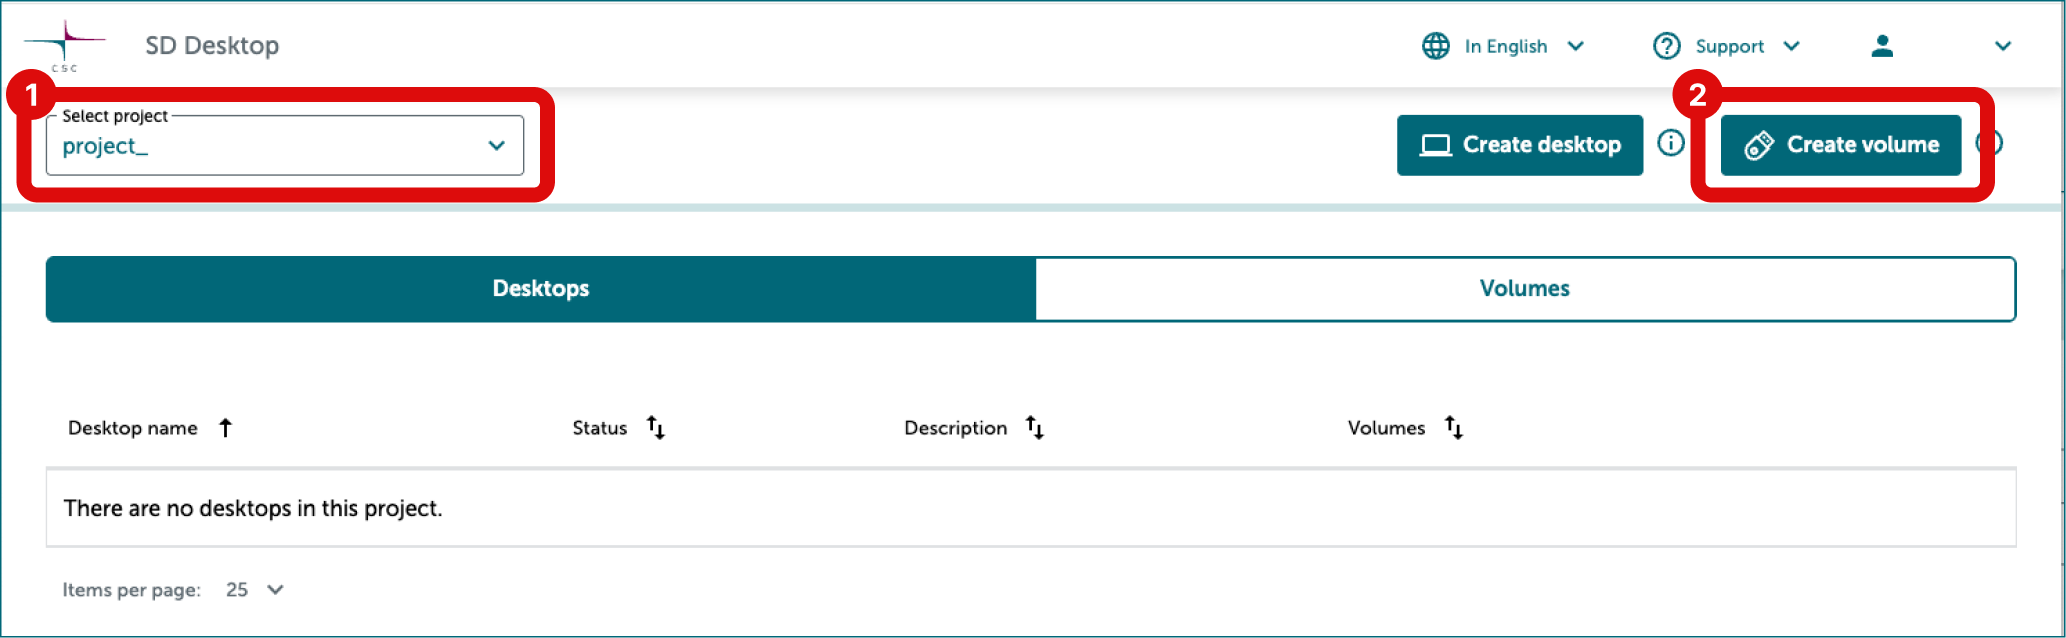
- Select correct CSC project from dropdown on the left side.
- Click Create volume.
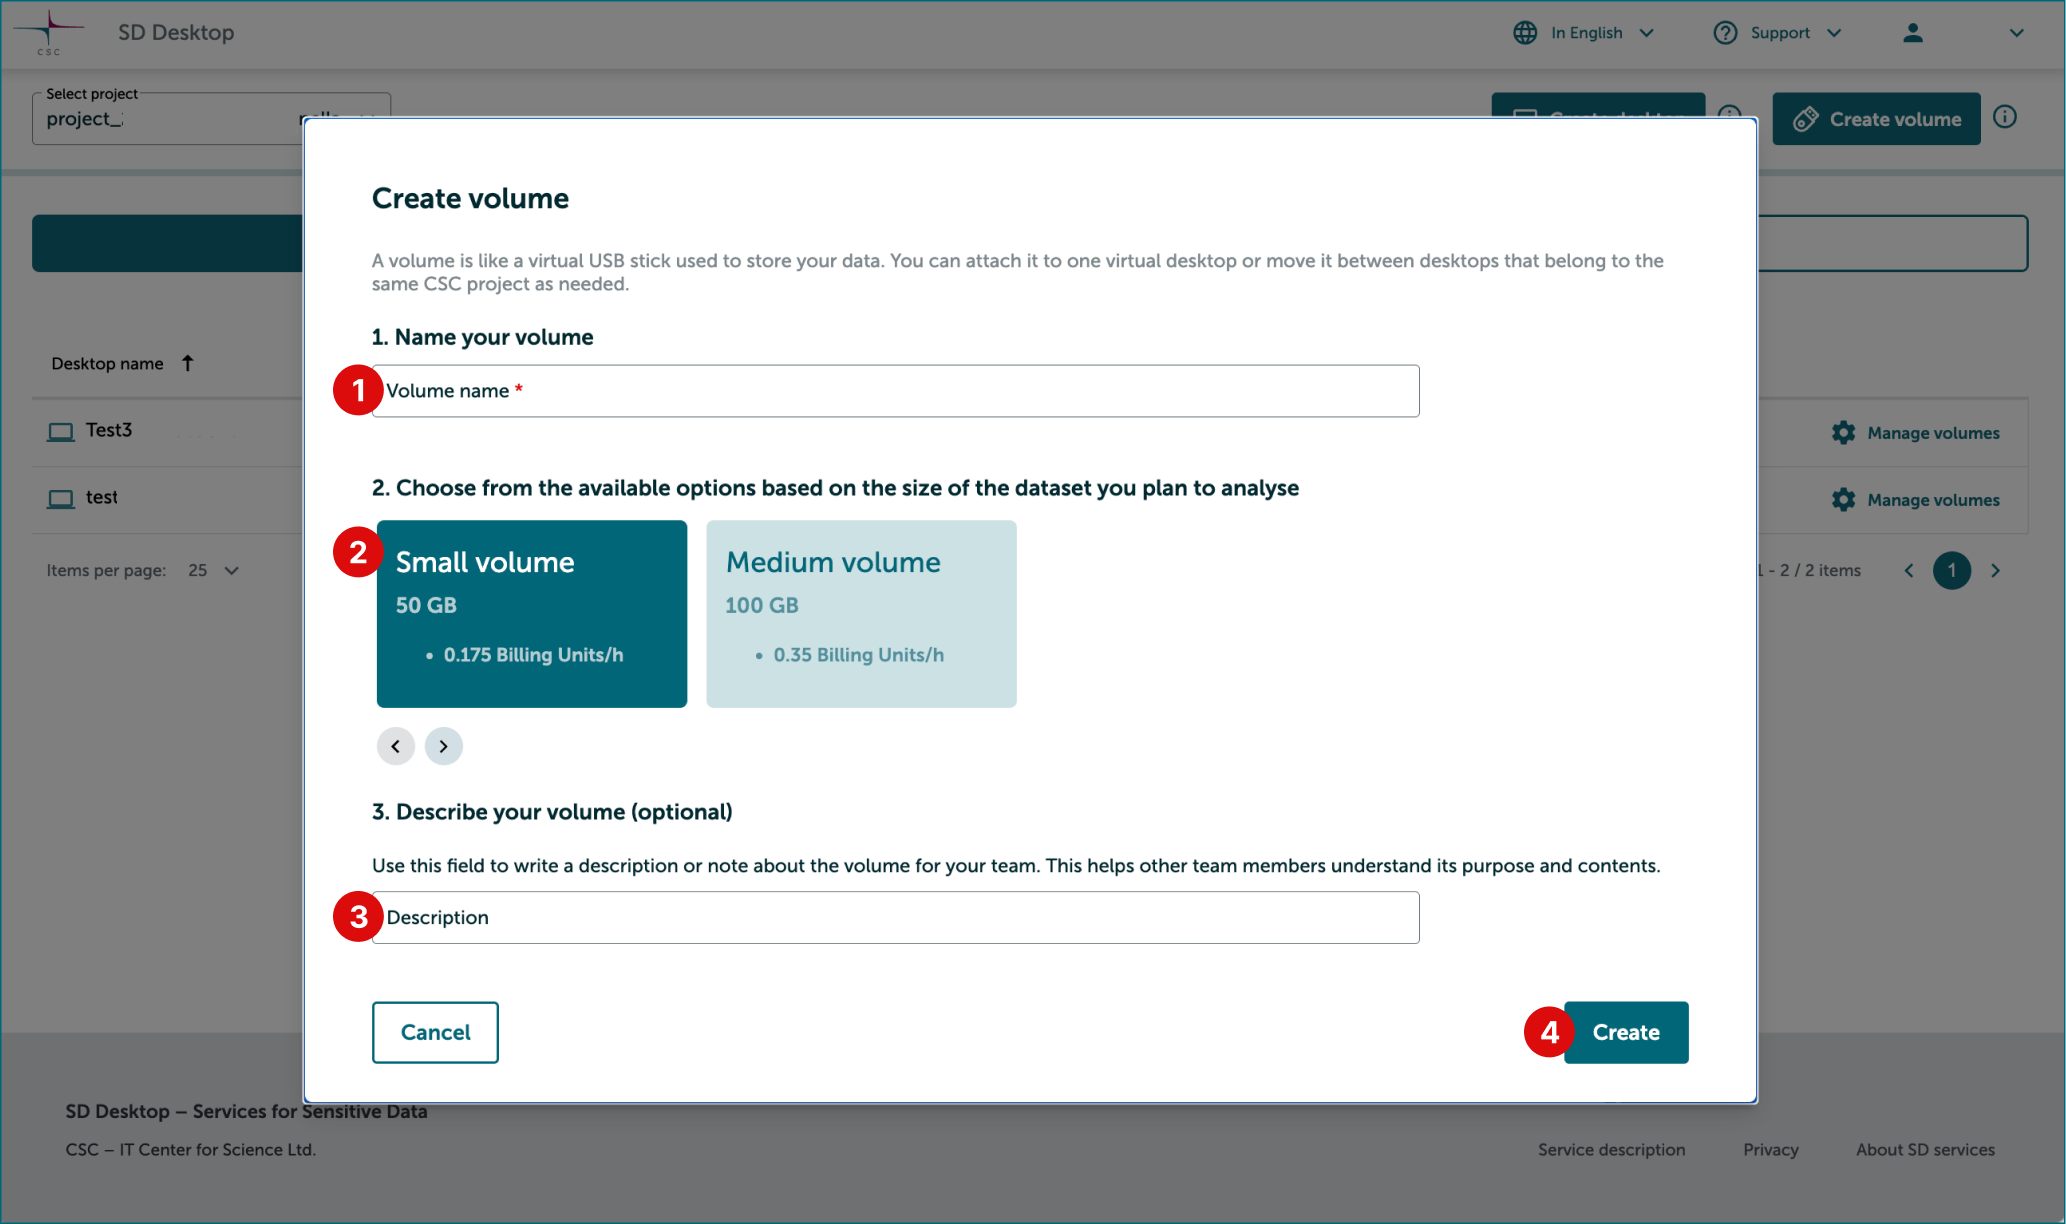
In Create volume window
-
Select a name for your volume. Choose a clear and descriptive name - especially if you're working on multiple projects - and make sure it only contains letters or numbers, with no special characters or spaces.
-
Choose from the available options the one that covers the combined size of your dataset and working files. If you are unsure about which volume size you should choose, send an email to CSC Service Desk.
-- Add sizes table 200 GB, 500 GB, 1 terabyte--
-
Write optional description or note about the volume to help your team members understand its purpose and contents.
-
Click Create. The window will now close and volume creation will start.
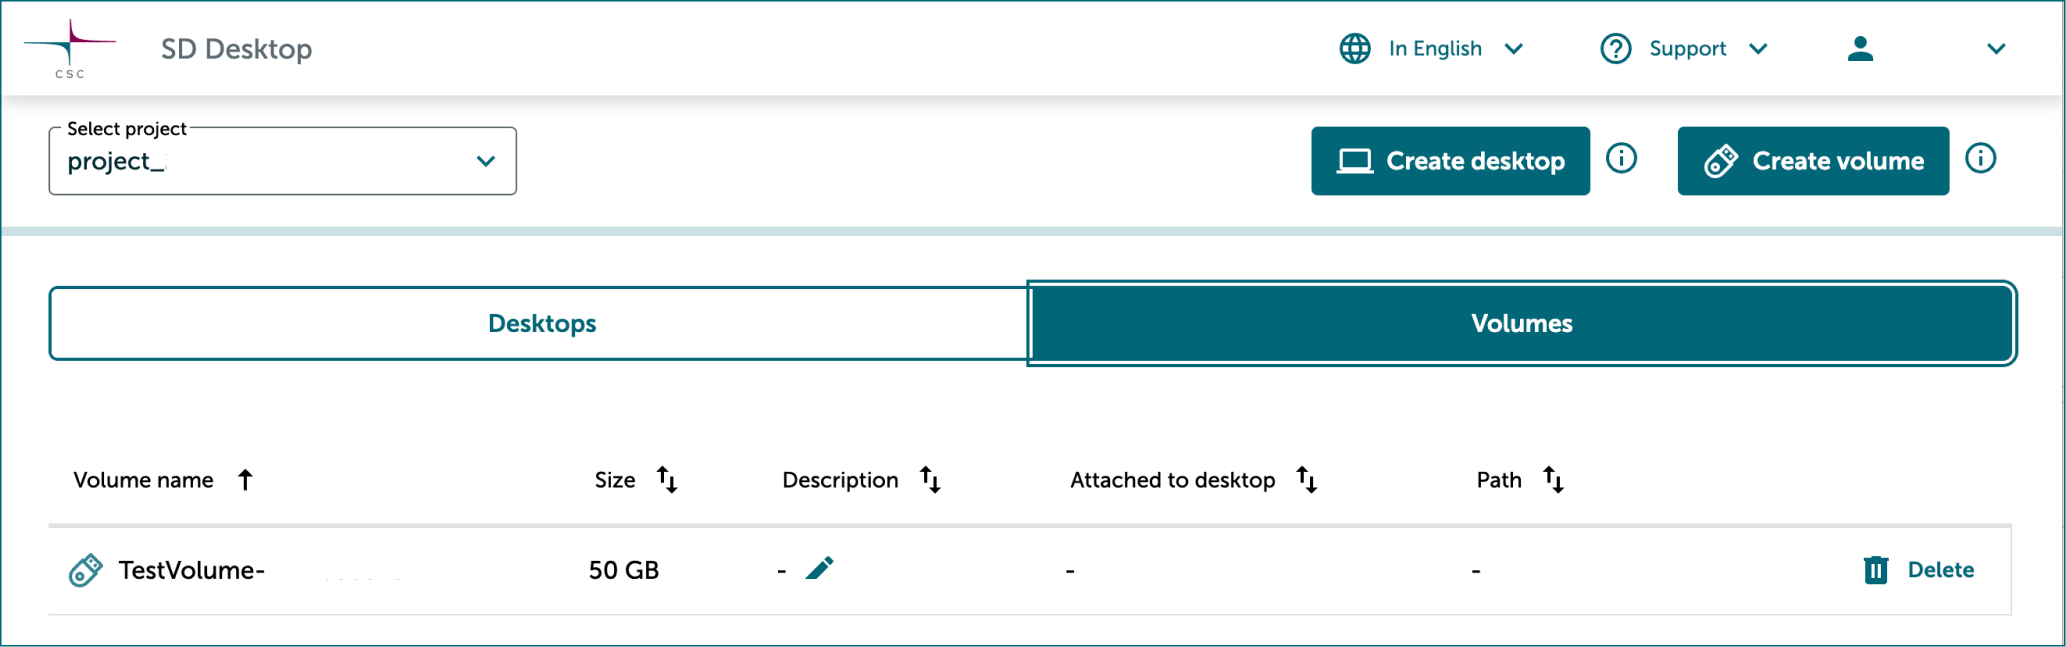
Back on the main page, you will see a list of your volumes. You can now proceed to attach it to your desktop.